DIY Real Vanilla Extract

Well we’ve had an eventful year already. The Chef found out that he had a pretty good size hernia late last year, and the hospital couldn’t fit him in until the beginning of the year. The day of the surgery they told us he wouldn’t be up and moving for 3-4 days. Wrong. It was a good week before he was willingly getting up and moving on his own. So that was fun. But it’s taken me about two weeks to get back in the groove of things. Guess I can’t complain. When half of your team is down, it’s then you realize how much you depend on them!

One of the things that The Chef and I have been making ourselves for quite some time is homemade vanilla. It’s so incredibly easy, and your wallet will love it. A small bottle of real vanilla extract at the stores cost anywhere from $7 on up. What many people don’t know is real extract is more than likely just infused alcohol.

I think you see where I’m going with this.

We used a cheap clear 750ml bottle (or somewhere around that size) with a pop-top to hunker it down (or just use the vodka bottle if you’ll be using it all).

Filling the bottle with a vodka of your choice (we used Svedka because you can get a pretty big bottle of it at Costco for $21, good quality while still on the cheap side), cut open 2-4 vanilla beans, length-wise, and scrape the seeds out of the pod and into the bottle. Once the seeds are transferred, drop the pods in as well. Place somewhere safe for 2-3 weeks.

The Everyday Chef and Wife : DIY Homemade Vanilla Extract

The Everyday Chef and Wife DIY Homemade Vanilla Extract

Over the course of the weeks, you’ll see the alcohol start to turn tan, to a light amber, to brownish amber. This is the color we want! (Depending on how big your bottle is will depend on how many vanilla beans you will need to use. If after two weeks it’s still not dark enough, scrape out and add another bean for another week.) The Everyday Chef and Wife DIY Homemade Vanilla ExtractFilter out all bean pods at the end, when you have achieved the color. The Everyday Chef and Wife DIY Homemade Vanilla ExtractPour the extract back into the bottle and voilá! You now have a huge bottle of vanilla extract that tastes amazing and will lasts you months (if not years. However much you make sweets 🙂 ) I go through mine in about 6 months. I definitely needed a cheaper version than the $7+ sample size bottle from the stores. Ugh. The Everyday Chef and Wife DIY Homemade Vanilla Extract
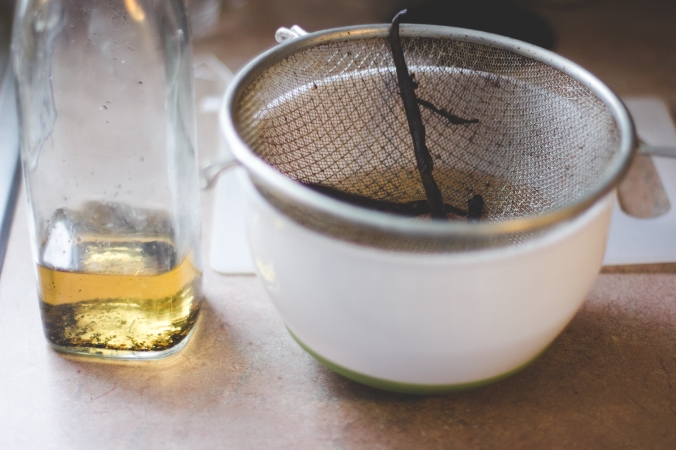
*Tip: The cheapest place the buy vanilla beans, that we’ve found, is World Market. You can find them in a small ziplock bag (not the bottle) for $2.99 for two beans. AMAZING! But if you know of another place that has them even cheaper, let us (and everyone else) know!!The Everyday Chef and Wife DIY Homemade Vanilla Extract

Did you know that the imitation vanilla and some vanilla extracts, aren’t even vanilla? They contain or are actually vanillin which is a common vanilla flavoring made out of a component found in wood. It is also easy to make synthetically. Not exactly what we’re looking for when preparing quality made foods, amiright? Read labels!

I hope you all are baking plenty and staying cozy!! Lets hope and pray for no more surgeries in 2015! YES LORD!

-The Everyday Chef and Wife

New Years Goal 2015- Something for the mind, body, and soul

We don’t like resolutions.

But we do like to think of goals of how to better ourselves in the next year. Something to strive for, giving a little room for set backs, but with enough motivation behind it to drive us through the year. The old saying “practice makes perfect” is getting a facelift, because no one is perfect. “Practice makes permanent” as our pastor just taught us last Sunday, are words to live by!

This year The Chef and I are slightly continuing our goal from last year, only with more oomph. We are going handmade and homemade, baby! Down to the wire as much as we possibly can. We are going to try to figure out how to make as much of our own food instead of buying processed, packaged foods.

We did pretty good last year, with making our own pizza, ice cream, pasta, mascarpone cheese, and various other things. But the problem was, we didn’t plan properly. We would make things here and there when we had time and thought of a new recipe to blog, and then when it was inconvenient, we would go out and buy the product. What’s that about?

Oh yea. I had no motivation.

This year I want to strive to make (and pre-make) as much of our food as we can. Also, keeping track of our grocery bill each month to see how much we’re actually saving. And on the way I really want to talk and learn more about what preservatives, gmo’s, fillers, and other unnecessary chemicals are being used in store bought items and how they effect our body.

We want to be healthy, but that doesn’t mean we aren’t going to use sugar, heavy cream, and butter, but we want to be wholesome in how we eat, in monitored portions. Because it’s not always what you eat, but how much. Moderation is key.

Obviously there are going to be things we can’t make, because unless The Chef is hiding the fact that he can crap an egg, I think we’re going to have to go the buying route. Where we are saving money on not buying convenient food, we’ll be putting it into better quality (organic, gmo free) products wherever we can.

There are going to be failures of recipes (oh so many…), and I know I’m going to want to quit. Please stand by us and be patient as we learn.

We are so excited with the changes and goals we are setting. Here we come 2015!

IMG_5017.JPG

– The Everyday Chef and Wife

Countdown to Christmas! Our Favorite Goodies and Movies : #1 The BEST Hot Cocoa and The Santa Clause

Christmas time is here!!!!!

rocketman

Well for me (The Wife) it’s been here since late August. By the time late summer hits, I’m dreaming of cozy nights snuggled under a blanket watching Christmas movies and drinking hot chocolate. I love spring and summer, but I have an obsession with fall time going into winter.

As much as it pained me, I held off a count down to Christmas until December hit. I knew that after the winter we had last year I would be chastised big time if I was wishing for more of the “devils dandruff”. But now, we are here with twinkling lights and the scent of pine flowing through the house and we can party hardy!

The good Lord has blessed The Chef with a many wonderful talents, but one of the prevalent ones is the gift of making THE best hot chocolate that has ever been known to man kind. This isn’t the hot chocolate that you grew up with.

Do you remember the scene in the movie The Santa Clause where Scott Calvin (hashtag Santa Claus, hashtag Tim Allen, hashtag the pure essence of Michigan for me… I still tear up when I hear Pure Michigan commercials, and I live in Michigan) goes to the North Pole after Santa fell off his roof, making him the new Santa. Judy the elf appears with hot cocoa that took her “1,200 years to get it right”… “Not too hot, extra chocolate, shaken, not stirred.”

tumblr_me8cnqHopO1qegr31o5_500

Ever since the first time I watched the movie, I literally (literally) would dream about drinking this hot cocoa. I felt like I knew what it tasted like, and nothing in my childhood experience in hot chocolate even came close to it.

Until my own husband, The Chef, my lovely, lovely Chef made it happen. And bonus, it’s incredibly easy. No weird ingredients. It’s really all in the process.

– 1 1/2 cup Heavy Cream
– 3/4 cup water
– 2 packets of any hot cocoa mix

Simmer heavy cream and water in a small saucepan until hot, being careful not to scold the cream mixture.

Take your favorite mugs and run hot water over them, and let them sit with hot water in them to warm up.

_MG_2737-2

This way your hot cocoa will stay warmer for longer.

Once the cream is hot, pour into either a blender or a container that you can stick your immersion blender in (the pot should be fine if it’s big enough).

Pour in the hot cocoa packets. Blend for about 30 seconds. This step is key. When you blend, you are frothing and slightly whipping the cream to give it an incredible texture that you can’t tell if it’s thick or light. I don’t even know how to explain it other than that. It’s just pure genius.

*Optional* Make whipped cream. Make sure to add in a little vanilla with your powdered sugar and whip again until thick. Add a dollop on top of your steaming mug of cocoa and sprinkle crushed candy canes for an extra wow factor.

It’s like a chocolate cloud melting in your mouth. It’s thick and chocolatey, sweet and satisfying. I want to open up a hot cocoa shop just so we can serve this, but really, you can make this just as easily. And you should.

And when you do watch The Santa Clause and revel in the part with the hot cocoa and know that you are drinking the same wonderful, chocolatey drink. It is a countdown to Christmas must!

Dinner Tonight 10-27-14

I’m writing to you in a freshly made bed with a huge comfy sweatshirt on. One of The Chef’s sweatshirts. There is a magnificent feeling of crawling into a bed with freshly washed sheets. What feeling is that? I feel like there’s not even a word that properly describes.

It’s similar to the feeling of sinking your teeth into a slice of pizza. I’m not talking about the mass chain pizza slices. I’m talking about great pizza. There has only been a few times in my life where I have felt such utter blissful indulgence when biting into a pizza, and tonight was one of them.

I made an accelerated version of artisan bread dough/pizza dough, where I put
2 2/3 cup of warm water
1 Tbsp (yes Tablespoon) of active dry yeast
6 cups of bread flour
1 Tbsp salt

I let it rise for 1 1/2- 2 hours for the first rise. Quartered it off, used one quarter for the pizza and froze the rest in their sections.
2nd rise for 1 1/2 hours.
Preheat the oven for an hour with your pizza stones/unglazed quarry tiles in for the preheat.

The Chef made this exquisite masterpiece tonight with a garlic butter sauce, fresh mozzarella, and Brussles sprouts, broccoli, and pepperoni for toppings. We’ve made this pizza before and it’s always been a knockout but tonight he completely outdid himself.

If I was a rich girl, I would be opening up a pizzeria tomorrow so I could let you try a slice. The only enjoyment about being full, was the reminder that leftovers would be available for lunch tomorrow.

I’m just sorry you won’t be there.

Not really. More for me.

-The Wife- IMG_4510.JPG

Dinner Tonight 10-26-14

Tonight The Chef and I decided to have a little fall date night in tonight. Something that isn’t uncommon around this time of year. Nothing sounds better to me than snuggling up watching an classic “fall” movie while eating dinner next to candles and or a fire.

After one of the last warm days we’ll probably see this year, and The Child jumping into leaves with the neighborhood kids, The Chef and I turned on some Christmas music (I make him listen to it this early. I love Christmas music!!) and started doing our daily waltz around the kitchen.

Here is a peak of our view. IMG_4503.JPG
I crave monster cookies this time of year, and tonight was a perfect night to make some. The Chef calls it irony. I call it scrumptious. We have about 10 acorn squashes leftover from an event so The Chef tried to put some to use. He cut it in half, scrapped out the seeds, and added oil, cinnamon, brown sugar, and reduced maple brown ale from a previous recipe. He roasted it in the oven at 350 deg for roughly 30 minutes and 400 deg for another 40. Normally you don’t have to roast them for that long but I was baking cookies and made some homemade fries. We just figure they could stay put and keep warm. Piping hot, really.
IMG_4502.JPG
I can’t get enough of homemade fries. They’re easy and relatively healthy, and don’t take that long. I might go as far to say I like them better than deep fried fries. Is that proclaiming too much? Is that sacrilegious? Either way, I love em. Cut up some taters, toss them in some oil, salt and pepper them and roast on 400 deg until they’re tender. It’s up to you how crispy you want them.

IMG_4501.JPG
We then made burgers. Ooooh man burgers. My go to meal. If I could eat a burger for everyday for the rest of my life, and not gain an ounce, I would. It’s not really even a question.

IMG_4500.JPG
For our entertainment, The Chef chose the first pick of “It’s the Great Pumpkin, Charley Brown!” It’s a favorite and a tradition. We had just put The Child down for bed when we started it and changed our minds and pulled him out, convinced that he needed to experience it with us. He snuggled up next to me and helped me eat my fries. I think we gained some major parent points tonight in that kids eyes. It’s not going to become a habit though.

Since the Charley Brown movie was only 20 minutes long (and after The Child was tucked back into bed), I chose the movie Clue.

Have you ever seen the movie Clue? It’s fantastic. The game was one of my favorites growing up, and seeing it brought to life makes it that much better. I also really enjoy the old movies with slapstick, and weird humor, with just a little mystery. Like Young Frankenstein, or the Goonies. You can’t beat em. So good right??

Fall nights like this are my favorite! I’m excited to see what date night in we’ll do next 🙂

Ps. Any good ideas of what to do with 9 acorn squashes? Running out of ideas…

-The Everyday Chef and Wife-

Dinner Tonight 10-24-14

I made vegan pasta! Wanna know how?

Flour, salt and water.

The Chef had a personal chef cook day, and he’s always hungry by them time he gets home. And he never wants the leftovers that he might have of the food he just made. It was up to me to scour the fridge.

I found leftover Brussels sprouts from our garden, and an heirloom tomato. That’s not all we have in our fridge, believe me , but it’s what piqued my interest. But what could I make with it to fill our bellies?

Homemade pasta.

I know I posted way earlier about homemade pasta, and it’s a good recipe. But to me it was just a little to much to just whip something up. Call me lazy. I decided to just try flour, salt and water instead of the original recipe. I want things cheap but good. I like to get back to the basic of basics.

I roughly diced the tomatoes and cut the sprouts. Oiled em up and flopped it on a cookie sheet, and popped it in the oven to roast.

For the pasta I took about a cup of flour and around a half a cup of water and a sprinklage of salt. This isn’t exact. I added more water and then more flour to get a smooth textured ball, kneading it a few minutes to really work the gluten. Letting the dough rest for about 10 minutes wrapped in plastic wrap, I prepared for the following steps. Wipe down the counter, lightly sprinkle with flour, get your fav rolling pin, and go to town. To the town of pasta.

I rolled mine as thin as I could pooooossibly roll it. It had such a beautiful, smooth surface. I worked any excess flour into the dough as I was rolling it out because I had to peel it off the counter. But it was really quite perfect; when you eat the cooked pasta, you didn’t get the excess flour/starch left on. Delightfully light and tender.

Bring a pot of water to a boil, salting the water for extra flavor. This isn’t a step to skip. Salt your water.

Using the rolling pin as your cutting guide, and a pizza cutter as your tool, roll the pizza cutter against the side of the rolling pin to cut the pasta into whatever-width-you-desire strips. Toss them into the boiling water and cook for 2-3 minutes.

Strain but don’t rinse.

With the pasta in a personal sized bowl, I put in just a touch of butter to melt over top, but I think some really good EVOO would be just as tasty. Use good stuff. Sprinkle some fresh Parmesan on, a little bit of lemon zest (that really rocked it!) and salt and pepper. Top with the roasted veggies.

*Note: this dish is not vegan with the Parmesan cheese or butter but they are completely optional.

Holy cow it’s like I’m in Italy. Or I could imagine. (Anyone want to put me up??) The flavors were perfect. The slight al dente bite of the pasta mixed perfectly with the roasted veggies. The tomatoes were sweet and flavorful, and the Brussel sprouts gave it a slight earthy flavor, but the Parmesan and lemon zest really hit it out of the park. It was so simple and clean tasting. I could’ve ate 10 bowls. Lemon zest on pasta could be my new favorite thing…

No pictures this time as it was 9 pm when we ate and we scarfed it down so fast that my shutter probably wouldn’t have been able to capture it anyways.

But I would like to make a quick video about it… Hopefully soon. *hint hint on what’s in the works possibly* we’re getting our ducks in a row…

Wow! So 90% of that meal came from the work of my very own hands. I grew the veggies, and I made the pasta. How much more satisfying can you get? And it was really quite easy. I feel like lasagna would be harder.

That reminds me. I haven’t made lasagna in a while.

Try out vegan pasta! It’s so easy and satisfying! You’ll feel accomplished, I promise you that.

Whew with full, happy bellies, I wish you good morning/day/night.
-The Wife
IMG_4330.JPG

Garden Veggie Quiche For Anytime of the Day

Garden Veggie Quiche |The Everyday Chef and Wife

When I (The Wife) was growing up my mother made quiches on rotation, but instead of having it in the morning, we had it for dinner. Not until I married The Chef did I realize that quiches are generally served for breakfast/brunch. Blew my mind! But to this day, every time I think of quiche, I think of dinner, even though I will eat quiche for breakfast if that’s what’s served.

Quiche is such a simple yet elegant dish. There are endless possibilities to throw in. As long as you have eggs, pie crust, a bit of cheese (if you so choose), and an imagination, you will more than likely have a fabulous quiche.

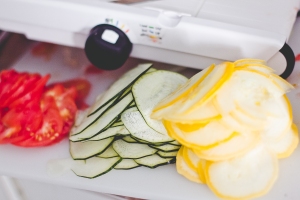
I chose to get rid of some of our garden veggies that keep replenishing. I grabbed out our mandolin and shredded half of a yellow squash, a third of a huuuge zucchini, 1 1/2 big heirloom tomatoes, and just a little bit of onion.

Garden Veggie Quiche |The Everyday Chef and Wife

Preheat the oven to 350˚.

I made my go-to pie crust and instead of rolling it out, I pressed it in. I have been seeing this method on various food videos and I wanted to try it out to see if it was something worth continuing. End result: it’s less messy on your counter tops, you don’t have to wash the rolling pin, but it was basically the same. I’ll leave it up to you if you want to try it. Rolling or pressing, just get that crust in there! 🙂

I layered it in a flower pattern, changing veggies on every level. It was really quite gorgeous. I continued until the veggies reached about 3/4 of the way up the pie pan.

I took about 5 eggs and about 1/4 cup of milk, a couple cloves of chopped up garlic , 1/4-1/2 tsp salt, a pinch or two of pepper, and a few shakes of dried thyme. Whisk it all together until well combined. Pour into the pie pan over the veggies. It’ll sink down more and get into all the cracks and crevices by itself, so don’t worry about that. Garden Veggie Quiche |The Everyday Chef and WifeTop with a good layer of some good cheddar cheese. Pop in the oven and bake for 40-45 min until the cheese is melted and the middle isn’t wiggly. Pull it out and let it sit for about 10 minutes before dishing up.

I made this for The Chef, and my two friends who came over, and everyone went back for seconds. The pie made like Houdini and disappeared. I’d say that’s a pretty successful healthy dinner. Or brunch if that’s your kind of thing. Another Chef tested, wife approved meal! Or Wife tested, Chef approved… Basically, I made it and he liked it.

Ok poll, who has quiches at breakfast/brunch and who has it for dinner? I’m kind of interested in seeing if I was just raised weird. (Love you ma! I agree with you; quiches at night 😉 )

What is your favorite quiche filling? Any crazy ones?

-The Wife

A catering event for the books!

Sometimes I wish I could just attend the parties we throw, instead of working them (behind the scenes, babysitting, etc.). This past weekend The Chef threw one heck of a partay. I was able to help with the creation of the dessert small bites (and by that I mean I thought of them and tried them out to see how they would work… I didn’t actually make them for the event. A professional did that :P). I love all the events that The Chef’s done, but since I was able to see photographic proof of this one, I wish I could’ve attended as a guest. I would have ate my whole weights worth.

I’m not going to tell you how much that is though.

I made a call to my photography colleague/friend from college, Marcella, who also graduated in photography, if she wouldn’t mind running down to the event to capture the deliciousness of the party. Let me tell you, it looked AH-mazing! (and I’ve had some of the left overs and those are pretty fantabulous as well.) She did so fantastic. We have booked her for future events when I’m stuck at home with The Little Man… Thank you Marcella!!!

The Chef did pasta stations where you can custom create your own plate with noodle types, sauces and toppings, along with different appetizers and charcuterie boards, cheese platters (cheese from Appertivo at the Downtown Market), and homemade desserts. I think my favorite is the ice bowls that we made with pansies and herbs frozen inside, encompassing Love’s Ice Cream’s Pumpkin and Thyme Sorbet, and also the homemade caramel corn (my recipe :)) in paper cones that they received right as they walked into the venue. “Please beam me right into that party, Scotty.”

Photo Credit to Marcella Jo Photography

*Descriptions of what each item is can be seen when hovering over the photo.*

Pasta Station

Small bites

Homemade Desert – Made by Brigitte Fouch

The Chef even did a cooking demonstration on grilling tips and techniques and how to make the Pots de Créme!

Thank you to everyone who helped out and made it a great event! Thank you to the Downtown Market for being such a great venue to work at! It is gorgeous!! A special thanks to Appertivo, Field and Fire, and Love’s Ice Cream for helping us out! You guys rock! We love doing business with you!

We are ready for more! We can’t wait to show off your dream parties and ideas!

-The Everyday Chef and Wife


Easy Homemade Peach Compote and Cream

Homemade Peach Compote with Cream

The summer has almost faded. I’m slightly torn with how I feel about it. On the one hand, the summer gives us yummy fruits, sunny beach days, warm nights for bonfires and stargazing, fresh garden treats and soooo much more.

But the fall gives us pumpkin flavored everything, spices, cozy nights, fuzzy socks and big sweaters, game nights by the fireplace, the ability to actually want to cuddle instead of pushing your significant other away for fear of suffocating heat.

I loooove fall. But more on that later.

Let’s make the most of summer while we can. Wring out the warmth and goodness for as long as we have it.

So confession. I have this problem about not using up the last of things. Especially fruit. It always seems to go bad before I can use it. I have all these great ideas that I want to use them for, and then poof. Fruit fly heaven. But this time, this time I was determined to use the last of these darn peaches for something. Then it hit me. Peach compote.

I have realized the amazingness of making my own jams and jellies. Compotes included. You have any fruit that needs to be used up? Just throw it in a pot with some sugar and water and maybe a bit of lemon juice and you’re golden. It’s pretty soothing.

Anyways, my three peaches needed to be used pronto. I saw the fruit flies circling it like vultures. For this compote I used:

Said three peaches, peeled and cut into chunks
3 Tbsp of sugar (you can choose to do more or less. Sweetness is to taste)
1/2 cup of water
1-2 tsp corn starch (mixed with a tiny bit of cold water to dissolve)
The juice of one small lemon (or half of a large one).

Cook on medium-high heat for 15-20 min. Let cool a bit before serving. Take cold cream (heavy or half & half) and pour over top. Serve and enjoy!

Make sure you taste the compote to be sure it’s to your liking. The lemon gives it a slight tanginess, but it’s more for depth of flavor. I found that it definitely needed it. Without it, it didn’t have enough flavor.

Use up those fruits! Take advantage of summer! But please God, let fall be close by!! My sweaters are calling my name.

-The Wife-

Quinoa Risotto Taco Salad

Quinoa Risotto Tace Salad-Vegan and Gluten Free

I feel like quinoa has shot up over the past few years. Growing up I never heard it muttered, and now everywhere you look quinoa is taking center stage. It’s awesome actually because not only is it yummy to the thousandth degree, but the healthy benefits are crazy good for you. That’s a win-win-win in my book.

michael-scott-win-win-win

The Chef inspired me to not only make quinoa, but to cook it as you would a risotto. I for one have never made risotto, but I’ve seen him make it multiple times. I was inspired! I grabbed my economy sized bag of quinoa and ran! If this was going to taste anything like ground beef, I was for it. Any excuse I have to use a ground beef substitute, I’m for it. I have not taken the role of a vegetarian, but meat is definitely not my favorite food. (Except burgers…. I looove me some burgers!!)

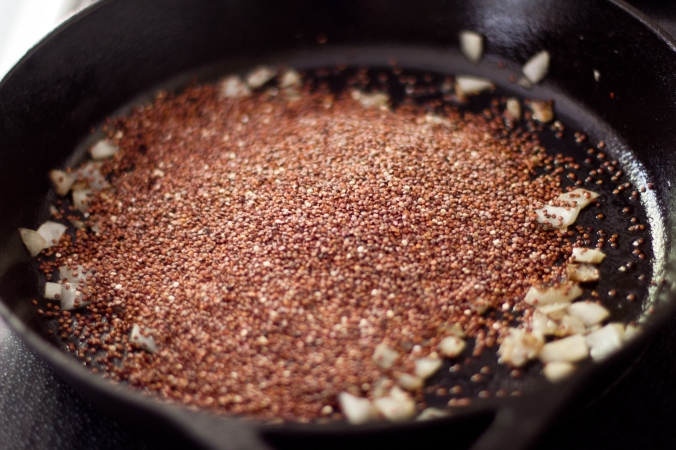
Dice a medium sized onion and place it in a large skillet drizzled slightly with oil. Cook over medium high heat until onion start to caramelize. Quinoa Risotto Tace Salad-Vegan and Gluten FreeAdd in 1 cup of uncooked quinoa. Toast slightly. This creates another flavor profile, ever so slightly to the quinoa.

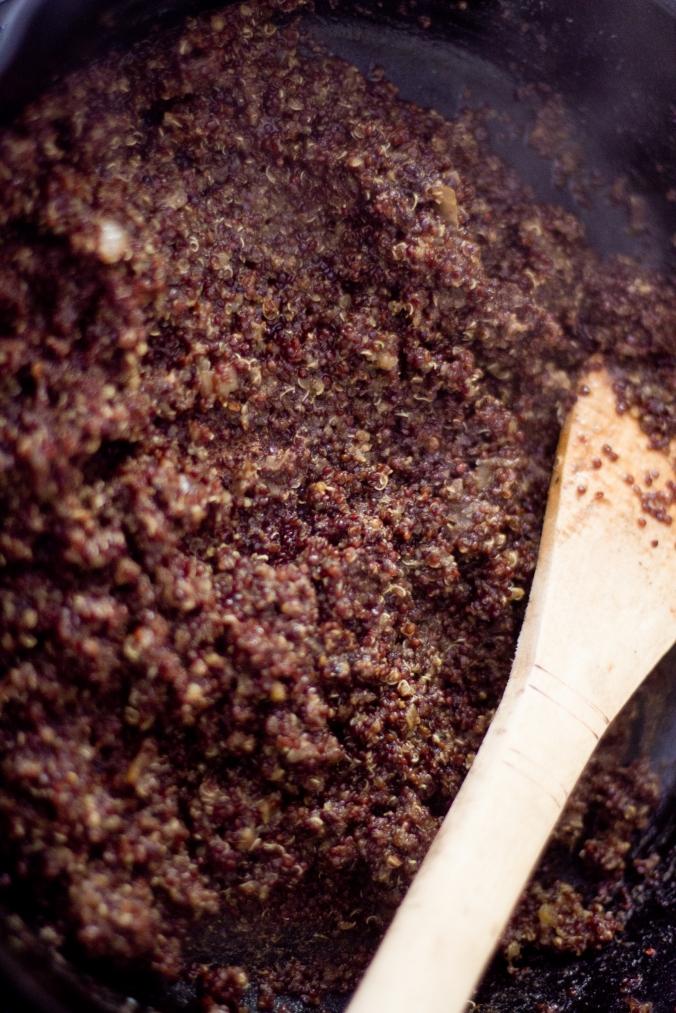
Add in a cup or two of vegetable stock. (You can use any stock you prefer, but if you’re doing quinoa, you might as well keep it legit vegetarian right?) The stock is going to cook into the quinoa, as well as evaporate out, so we will be using about 6-7 cups of stock. (As a cheat, you can use a couple cups of water if need be. But you should use mostly stock. We threw in some plain ‘ol water and it didn’t diminish the flavor.)Quinoa Risotto Tace Salad-Vegan and Gluten Free Once the quinoa soaks up the majority of the stock, add in more until fully cooked.Quinoa Risotto Tace Salad-Vegan and Gluten Free To test, get a spoon a try it out. It should be al dente. Not too crunchy, but still a touch of firmness. This will take close to 35 minutes or longer.Quinoa Risotto Tace Salad-Vegan and Gluten Free

Once the quinoa if cooked, add in your spices. For taco seasoning use:

2 Tbsp cumin
2 tsp garlic powder
1 tsp chili powder
A couple shakes of paprika
1 tsp salt
1/2 tsp black pepper

* This is all to taste. You can add more or less if you’d like to fit your taste buds.

The hard part is over! You have quinoa risotto taco “meat”. Sprinkle on some drained and rinsed black beans, avocado, tomatoes, cheese (if you prefer or you can go vegan and omit it completely), and whatever other taco toppings you like! It’s that easy folks. Quinoa Risotto Tace Salad-Vegan and Gluten Free

Next we are going to try this in some tortilla shells! I. Can’t. Wait.

Sounds like something you’d try? Test it out and let us know what you think!

-The Wife-